Authentication in Next.js

Introduction:
A crucial component of web development is authentication, which ensures users’ individualized and safe experiences. Implementing user authentication in Next.js, a popular React framework, includes a variety of solutions, including basic username/password authentication to using third-party vendors. We’ll dive into the complexities of creating user authentication, integrating third-party authentication providers, and protecting routes and resources in a Next.js application.
What is Authentication?
In Next.js, authentication is the process of confirming a user’s identity when they access a web application that was developed using the Next.js framework. Ensuring that only authorized users can access specific features, pages, or resources within the application is a key security safety.
Next.js is a React framework that allows developers to easily create server-rendered React applications. While Next.js offers a basis for online application development, proper authentication typically requires the usage of many authentication techniques and tools.
Implementing User Authentication:
1. Local Authentication:
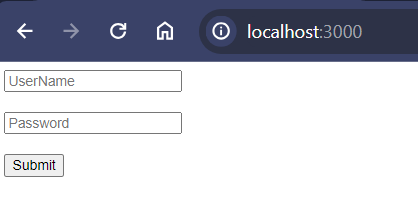
Handling user credentials within your program is known as local authentication. Here’s a simplified example that makes use of Next.js and a virtual authentication service:
// components/LoginForm.js
import React, { useState } from 'react';

const LoginForm = () => {
  const [username, setUsername] = useState('');
  const [password, setPassword] = useState('');

  const handleLogin = async () => {
    // Implement authentication logic here
    // For example, send a request to your authentication API
  };

  return (
    <div>
      <input
        type="text"
        placeholder="Username"
        value={username}
        onChange={(e) => setUsername(e.target.value)}
      /><br/><br/>
      <input
        type="password"
        placeholder="Password"
        value={password}
        onChange={(e) => setPassword(e.target.value)}
      /><br/><br/>
      <button onClick={handleLogin}>Login</button>
    </div>
  );
};

export default LoginForm;
Output :
2. Session Management:
After a user has been authorised, it is critical to manage their session. The useSession hook in Next.js makes it simple to manage sessions on the client side:
// pages/dashboard.js
import { useSession } from 'next-auth/react';

const Dashboard = () => {
  const { data: session } = useSession();

  if (!session) {
    // Redirect to login if not authenticated
    return <p>Please log in to access the dashboard.</p>;
  }

  return (
    <div>
      <h1>Welcome, {session.user.name}!</h1>
      {/* Dashboard content */}
    </div>
  );
};

export default Dashboard;
Make sure the component you’re using with useSession is inside a parent component that has the SessionProvider wrapped around it. Here your Example :
import { SessionProvider } from "next-auth/react";
import Dashboard from "./Component/Dashboard ";

export default function Home() {
  return (
    <>
      <SessionProvider>
        <Dashboard />
      </SessionProvider>
    </>
  )
}
Output :
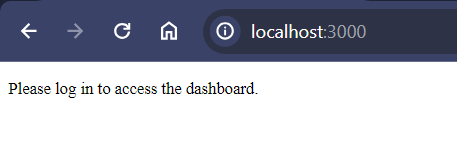
This JavaScript code replicates the functionality of the original JSX/React example you provided. It checks if the user is authenticated using the useSession hook from next-auth/react. If it does not, it shows a message asking the user to log in. If the user is authenticated, it displays a welcome message as well as the user’s name. The actual dashboard content can be added within the div where it says “Dashboard content.”
Using Third-Party Authentication Providers:
1. NextAuth.js Integration:
NextAuth.js simplifies integrating with various authentication providers. Install it and set up a basic configuration:
npm install next-auth// pages/api/auth/[...nextauth].js
import NextAuth from 'next-auth';
import Providers from 'next-auth/providers';
export default NextAuth({
providers: [
Providers.Google({
clientId: process.env.GOOGLE_CLIENT_ID,
clientSecret: process.env.GOOGLE_CLIENT_SECRET,
}),
// Add other providers as needed
],
});
2. Adding Authentication Buttons:
Implement authentication buttons in your application, linking to the appropriate provider:
// components/AuthButtons.js
import { signIn } from 'next-auth/react';

const AuthButtons = () => {
  return (
    <div>
      <button onClick={() => signIn('google')}>Sign in with Google</button>
      {/* Add buttons for other providers */}
    </div>
  );
};

export default AuthButtons;
Protecting Routes and Resources:
1. Authenticated Routes:
Create a higher-order component (HOC) to protect routes that require authentication:
// components/ProtectedRoute.js
import { useSession } from 'next-auth/react';
import { useRouter } from 'next/router';

const ProtectedRoute = ({ children }) => {
  const { data: session } = useSession();
  const router = useRouter();

  if (!session) {
    // Redirect to login if not authenticated
    router.push('/login');
    return null;
  }

  return <>{children}</>;
};

export default ProtectedRoute;
2. Usage in Pages:
Apply the ProtectedRoute component to secure specific pages:
// pages/dashboard.js
import ProtectedRoute from '../components/ProtectedRoute';

const Dashboard = () => {
  return (
    <ProtectedRoute>
      <div>
        <h1>Authenticated Dashboard</h1>
        {/* Dashboard content */}
      </div>
    </ProtectedRoute>
  );
};

export default Dashboard;
Conclusion :
Next.js provides a solid framework for enabling user authentication, whether through internal or outside suppliers. You may improve security and streamline the authentication process by using NextAuth.js. Also, securing routes and resources ensures that only authenticated users have access to sensitive data. Use the examples and ideas provided to improve the authentication experience in your Next.js applications, giving users secure and personalized interactions.