JavaScript – Switch Case
In the realm of JavaScript programming, the “switch case” statement is a versatile tool that simplifies decision-making. It’s akin to having a menu of options, where you choose one based on a specific condition or value. In this article, we’ll delve into the world of the “switch case” statement, understanding its syntax, exploring its applications, and providing practical examples to make it crystal clear.
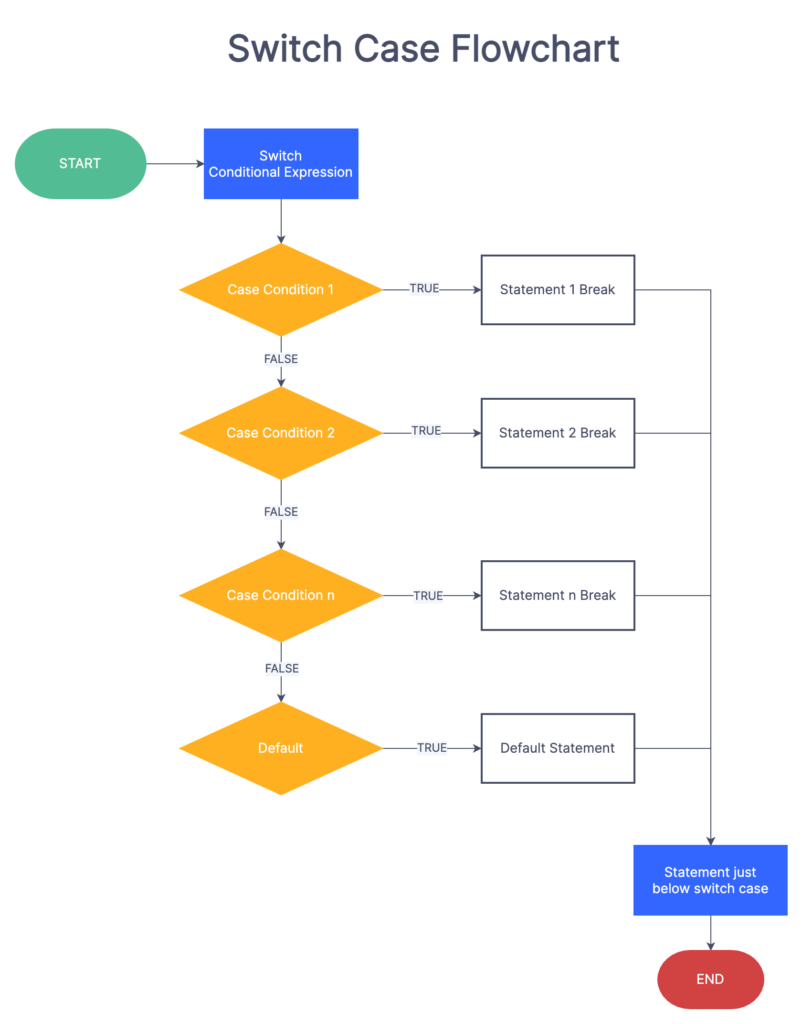
Flow Chart of Switch Case :
Understanding the Switch Case Statement
The switch case statement, at its core, is designed to compare a single value against multiple possible values. It excels when you need to direct the flow of your program based on the outcome of this comparison. Think of it as an efficient way to make choices within your code.
Syntax of the Switch Case Statement
The structure of the switch case statement is relatively straightforward:
switch (expression) {
case value1:
// Code to execute if expression equals value1
break;
case value2:
// Code to execute if expression equals value2
break;
// Additional cases as needed
default:
// Code to execute if none of the cases match expression
}Code language: JavaScript (javascript)Breaking it down:
expression: This is the value you want to compare against different cases.case valueX: Eachcaserepresents a possible value thatexpressioncan take. If there’s a match, the code block associated with that case gets executed.break: Thebreakstatement is used to exit the switch case block once a match is found. Withoutbreak, the code would continue executing into the next case(s) until abreakor the end of the block is encountered.default: Thedefaultcase is optional and serves as a catch-all. If none of the defined cases match theexpression, the code block underdefaultgets executed.
Use Cases of the Switch Case Statement
The switch case statement shines in several scenarios:
- Menu Selection: When you’re building an application with a menu, switch case is perfect for executing different functions or displaying distinct content based on the user’s menu choice.
- State Management: For applications that involve different states or statuses, switch case helps keep things organized. You can handle various states and perform specific actions for each one.
- Data Parsing: When parsing data, such as JSON or user inputs, switch case can come to the rescue. It allows you to process data differently based on its type or content.
Practical Examples
To grasp the switch case statement’s power, let’s explore a few practical examples.
Example 1: Menu Selection
Imagine you’re creating a calculator that performs various arithmetic operations based on user input. Switch case can manage the user’s menu selection efficiently:
function calculate(a, b, operator) {
  let result;
  switch (operator) {
    case '+':
      result = a + b;
      break;
    case '-':
      result = a - b;
      break;
    case '*':
      result = a * b;
      break;
    case '/':
      result = a / b;
      break;
    default:
      result = "Invalid operator";
  }
  return result;
}

// Example usage:
console.log(calculate(5, 3, '+')); // Output: 8
console.log(calculate(10, 2, '*')); // Output: 20
console.log(calculate(8, 4, '%')); // Output: Invalid operatorCode language: JavaScript (javascript)
In this example, switch case evaluates the operator and performs the corresponding mathematical operation.
Example 2: Day of the Week
Suppose you want to determine the day of the week based on a numeric input. Switch case simplifies this task:
function getDayOfWeek(dayNumber) {
  let day;
  switch (dayNumber) {
    case 0:
      day = "Sunday";
      break;
    case 1:
      day = "Monday";
      break;
    case 2:
      day = "Tuesday";
      break;
    case 3:
      day = "Wednesday";
      break;
    case 4:
      day = "Thursday";
      break;
    case 5:
      day = "Friday";
      break;
    case 6:
      day = "Saturday";
      break;
    default:
      day = "Invalid day number";
  }
  return day;
}

// Example usage:
console.log(getDayOfWeek(3)); // Output: "Wednesday"
console.log(getDayOfWeek(7)); // Output: "Invalid day number"Code language: JavaScript (javascript)
Here, switch case converts a numeric input into the corresponding day of the week.
Example 3: Handling User Roles
In a web application, you might want to grant different privileges to users based on their roles. Switch case manages user roles effectively:
function grantAccess(userRole) {
  switch (userRole) {
    case 'admin':
      console.log("Admin privileges granted.");
      break;
    case 'editor':
      console.log("Editor privileges granted.");
      break;
    case 'viewer':
      console.log("Viewer privileges granted.");
      break;
    default:
      console.log("Invalid user role.");
  }
}

// Example usage:
grantAccess('editor'); // Output: "Editor privileges granted."
grantAccess('customer'); // Output: "Invalid user role."Code language: JavaScript (javascript)
In this scenario, switch case determines the privileges granted to users based on their roles.
Conclusion
The switch case statement in JavaScript simplifies decision-making and streamlines complex branching logic. It excels in scenarios where you need to compare a single value against multiple possible values. Whether you’re building a calculator, managing user roles, or handling menu selections, the switch case statement organizes your code and makes it more efficient. By mastering its syntax and usage, you’ll be better equipped to create robust and responsive JavaScript applications.
Related posts:

Powered by YARPP.